Bottling your kombucha is a great way to store it and have it on hand for when you need it. It’s also a good way to share your kombucha with friends and family. In this article, I’ll show you how to bottle your kombucha at home. I’ll also provide some tips on how to make sure your bottling process goes smoothly. Let’s get started!
First, sanitize your bottles and caps. I recommend sanitizing them with a food-grade sanitizer, such as Star San. Fill your bottles with kombucha, leaving about an inch of headspace at the top of the bottle. Cap your bottles and store them in a cool, dark place for carbonation to occur. After 1-2 weeks, your kombucha should be carbonated and ready to drink! Be sure to refrigerate it until you’re ready to enjoy.
About Kombucha
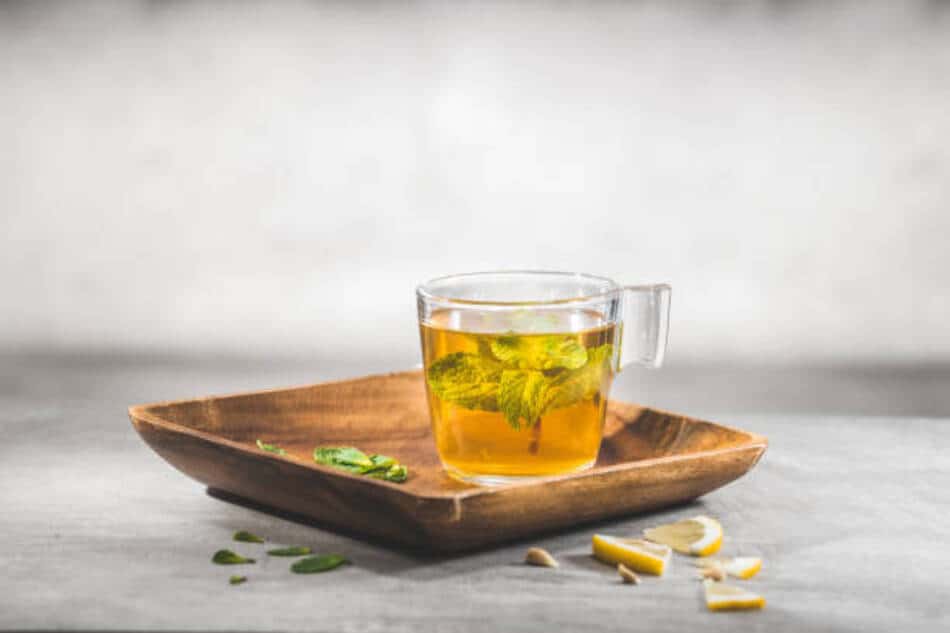
Kombucha is a fermented tea that has been around for centuries. It’s made by adding sugar to black or green tea and then fermenting it with bacteria and yeast – a process called “symbiotic fermentation.” The result is a tangy, slightly sweet drink that can be either effervescent or still depending on how much sugar was initially added. Kombucha originated in China about 2,000 years ago but nowadays you’ll find it just about anywhere people are looking for healthy refreshment.
Kombucha contains trace amounts of alcohol (less than 0.5% ABV) as well as B-vitamins, amino acids, organic acids like glucuronic acid and lactic acid, probiotics, and other beneficial yeasts and bacteria. While many people believe that kombucha has detoxifying properties, there is no scientific evidence to support this claim.
If you’ve ever had store-bought kombucha, you know that it can be quite expensive (anywhere from $3 to $5 per bottle). But you can easily make your own at home for a fraction of the cost. All you need is a SCOBY (symbiotic colony of bacteria and yeast), some sugar, tea, and patience while it ferments.
Did you know that you can also repurpose your kombucha bottles? Now you know.
This process is called “bottling” and is how most commercial kombucha producers make their products. It’s also how you can carbonate your kombucha at home without having to invest in costly equipment.
What You’ll Need:
- 1 SCOBY per fermentation vessel
- Black or green tea
- Sugar
- Bottles (preferably glass) with tight-fitting lids
- A funnel (optional)
Instructions
- Make a batch of sweet tea using 1 cup of sugar per gallon of water. You can use more or less sugar depending on how sweet you like your kombucha, but this is a good starting point. If you’re using loose tea leaves, brew them for 3-5 minutes then remove them before proceeding.
- Pour the sweet tea into your fermentation vessel/s, making sure to leave at least a few inches of headspace at the top.
- Gently lower the SCOBY into the vessel/s.
- Cover the top of the vessel/s with a clean cloth or coffee filter and secure with a rubber band.
- Set the kombucha in a warm, dark place (around 75 degrees Fahrenheit is ideal) and let it ferment for 7-10 days.
- After 7-10 days, taste your kombucha to see if it’s to your liking. If it’s too sweet, let it ferment for a few more days. If it’s too tart, you can add more sugar when bottling.
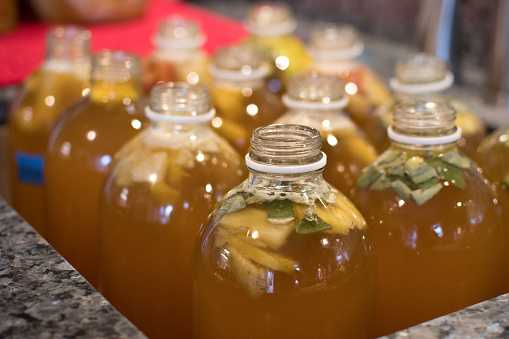
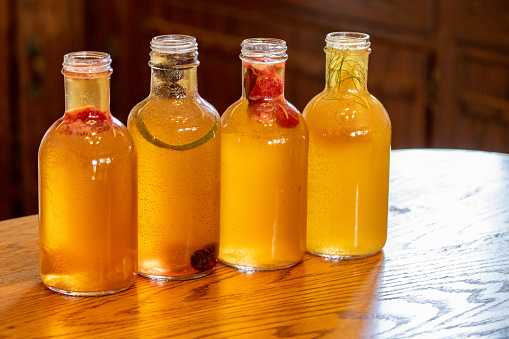
- When the kombucha is ready, sterilize your bottles by boiling them for 5 minutes.
- Use a funnel to fill the bottles, leaving about an inch of headspace at the top.
- Seal the bottles tightly and store them in a cool, dark place for 1-2 weeks. The longer they ferment, the more carbonated they will become.
- After 1-2 weeks, move the bottles to the fridge where they will keep for several months. Be sure to burp them every few days to release the pressure or else they may explode!
And that’s it! You’ve now made your own delicious, healthy kombucha right at home. Enjoy it as is or use it as a base for other beverages like cocktails or mocktails. Cheers!
Benefits Of Bottling Kombucha
Bottling your kombucha will give you several benefits, including:
- A longer shelf life: Bottled kombucha can last for months or even years, whereas kombucha that is not bottled will start to spoil after just a few weeks.
- Fewer contaminants: When you bottle your kombucha, you are essentially creating a seal that protects it from bacteria and other contaminants.
- Easier to transport: If you want to take your kombucha with you on the go, bottling it is the best way to do it.
If you’re ready to start bottling your kombucha, here’s what you need to do:
- Choose the right type of bottle: You’ll want to use a glass bottle with a tight-fitting lid. Plastic bottles are not recommended because they can leach chemicals into the kombucha.
- Clean and sterilize your bottles: Wash them in hot, soapy water and then rinse them thoroughly. You can also sterilize them by boiling them for 10 minutes.
- Fill your bottles with kombucha, leaving about an inch of headspace at the top.
- Seal the bottles tightly and store them in a cool, dark place.
- Enjoy your kombucha!
Kombucha bottling is a great way to extend the shelf life of your kombucha and make it easier to transport. Follow these simple instructions and you’ll be enjoying your homemade kombucha for months to come!
How Do I Know When My Kombucha Is Ready To Bottle?
There are a few things you can look for to determine whether or not your kombucha is ready to bottle.
- The first is taste. Kombucha should have a slightly sweet and sour taste. If it tastes too sweet, it’s not ready to bottle. If it’s too sour, it’s been fermenting for too long and might be over-fermented.
- The second thing to look for is carbonation. Bubbles should form on the top of the kombucha and rise to the surface. If there aren’t many bubbles, then your kombucha isn’t carbonated enough and needs more time to ferment.
- Finally, check the pH level of your kombucha with a pH strip test kit. It should be between 3.0 and 4.5.
When your kombucha is ready to bottle, sterilize all of your equipment beforehand. This includes bottles, siphons, hoses, funnels, and any other tools you’ll be using. You can sterilize them by boiling them in water for 5 minutes.
- Fill each bottle with kombucha, leaving about an inch of headspace at the top.
- Fill a siphon with kombucha and attach it to the bottles.
- Siphon the kombucha into the bottles, being careful not to agitate it too much so that the carbonation doesn’t escape.
- Seal the bottles with screw-on caps or flip-top lids and store them in a cool, dark place for 1-2 weeks to allow the kombucha to carbonate.
- After 1-2 weeks, move the bottles to the fridge and enjoy! Kombucha will continue to carbonate in the fridge, so open them slowly, or else the carbonation will escape. Enjoy your homemade kombucha!
Bottom Line
The first thing you’ll need to do is gather your supplies. For bottling kombucha, you’ll need bottles, a funnel, a strainer, a measuring cup, and kombucha. Now that you have your supplies, clean and sterilize your bottles, set up your bottling station, fill each bottle with kombucha, use the strainer to catch any solids then seal the bottles with their closures, and store them in a cool, dark place. That’s it! You’ve now bottled your kombucha. Enjoy it straight from the bottle, or use it in cocktails or other recipes. Cheers!